
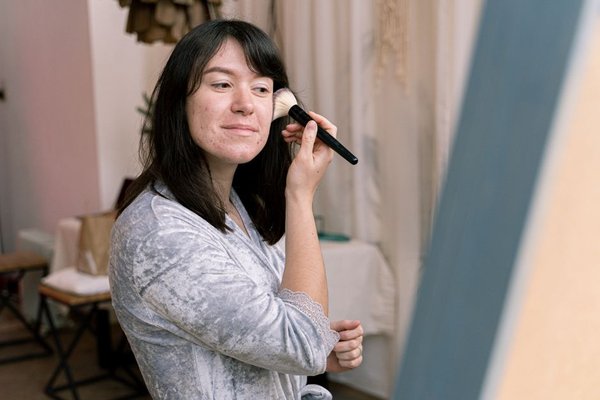
A breakout before your wedding can make every foundation recommendation feel urgent. But bridal makeup for acne-prone skin works best when it does less, more deliberately. The aim is not to erase every raised spot. It is to soften redness, even out tone, and let your complexion still look like skin, both in person and in photographs.
Makeup can disguise color more easily than texture. Heavy layers may hide a blemish initially, then settle around it as the day goes on. Gentle preparation, a light base, and precise concealing usually create a more comfortable finish.
Prepare Your Skin Without Last-Minute Experiments
In the weeks before the ceremony, consistency matters more than a dramatic facial. Continue using products your skin tolerates. For painful, persistent, or cystic acne, discuss a treatment plan with a dermatologist well ahead of the event. Effective acne treatments commonly need weeks to show improvement.
On the wedding morning, cleanse gently with lukewarm water and a mild cleanser. Skip abrasive scrubs, strong exfoliants, and unfamiliar masks. Irritation can increase visible redness and make foundation cling to dry patches.
Follow with a lightweight moisturizer suited to your skin. Even oily skin benefits from comfortable hydration beneath makeup. Consider products labeled non-comedogenic or oil-free, although individual reactions vary. Let moisturizer absorb before your base. If the ceremony is outdoors, use your usual sunscreen and test how it works beneath makeup during your trial. For ongoing preparation, a gentle skincare routine for acne-prone skin is more useful than an overnight overhaul.
Choose Coverage by Function, Not Thickness
For acne wedding makeup, one full-coverage product does not need to do every job. Let foundation balance the overall complexion and reserve concealer for individual marks. Clearer areas can then remain free of unnecessary layers.
Foundation That Evens Rather Than Masks
Choose a foundation finish you already enjoy wearing. Natural-matte or satin formulas may be easier to balance across oily and dry areas than an extremely powdery finish. Non-comedogenic products may be less likely to trigger breakouts, but a wear test remains essential.
Apply a small amount from the center of the face outward with a clean brush or sponge. Blend a thin veil across the forehead, cheeks, and jaw. Let it settle before considering a second light pass.
Concealer for Active Spots and Old Marks
One of the most useful wedding concealer tips is to match the technique to the mark. A red blemish may need a tiny amount of high-pigment concealer matching your foundation. A flat brown or purple post-acne mark may benefit from subtle color correction beneath concealer. Too much corrector, however, can show through.
Place concealer directly over the discoloration and tap around the edges without removing the center. Allow it to settle before adding more. On a raised blemish, neutralizing surrounding redness works better than trying to flatten its shape with product.
Use Thin Layers to Avoid a Cakey Finish
Picture a bride with clear cheeks but three inflamed blemishes on her chin. Coating her whole lower face in thick foundation will not make those spots flatter. Instead, she can apply a sheer base, add a tiny dab of concealer to each blemish, and set just the chin. The rest of the skin remains fresh.
Apply, Pause, Assess
Begin with moisturized skin and one thin foundation layer. Pause briefly, then apply targeted concealer using a small clean brush. Tap the perimeter gently to blend. Inspect your face at normal conversation distance before adding more. A magnifying mirror can tempt you to overcorrect details guests will barely notice.
Powder Only Where Needed
Press a little finely milled powder onto areas that get shiny or where concealer tends to move. Avoid repeatedly dusting powder over flaky acne. If you use setting spray, try it in advance. Neither powder nor spray guarantees flawless wear through heat, tears, and hours of photographs.
Test Texture, Shine, and Camera Lighting
Acne prone makeup can look different in sunlight, indoor lighting, and camera flash. During your trial, take photographs in each type of lighting expected at your venue. Include unfiltered close-ups and portraits from a normal distance. Look for separation around the nose, shine, overly pale areas, and product gathering on blemishes.
Remember that smooth-looking photographs do not mean texture-free skin. Side lighting naturally highlights bumps and pores; adding foundation may emphasize them. Balanced color, flattering blush, and defined eyes help the overall look feel cohesive.
Ask your makeup artist to note the products, shades, tools, and setting method used in a successful trial. If applying your own makeup, practice the complete routine and wear it for several hours. A helpful long-lasting bridal makeup guide should consider how the base looks at dinner, not only when first applied.
Keep Application Hygienic and Touch-Ups Light
Clean tools matter for acne-prone skin. The American Academy of Dermatology advises regular brush cleaning and avoiding shared makeup applicators. Professional artists should use hygienic practices, including clean tools and disposable applicators when appropriate. Avoid covering broken or infected-looking skin without seeking medical advice.
For touch-ups, gently blot oil with clean blotting paper before adding powder. Press rather than rub around concealed spots. Carry your chosen concealer and a clean applicator, plus a small compact. Refreshing one faded blemish usually looks better than applying another layer across the whole face. A practical wedding-day makeup touch-up kit can be very small.
Frequently Asked Questions
Can I wear full-coverage foundation if I have active acne?
Yes, if your skin tolerates it. But full coverage is not automatically better. A thin foundation layer with localized concealer often looks less heavy and is easier to maintain throughout the day.
Should I pop a pimple before bridal makeup?
No. Squeezing can increase inflammation and the risk of scarring. For a painful blemish shortly before the wedding, ask a dermatologist about appropriate treatment rather than experimenting at home.
How do I stop concealer from looking cakey over a pimple?
Moisturize, apply a very small amount of concealer, and gently blend the edges. Avoid thick layers and excessive powder over flaky skin. Raised texture may remain visible even when redness is concealed.
When should I schedule my makeup trial?
Arrange it early enough to change products or techniques before the wedding, ideally several weeks ahead. Wear the finished makeup through an ordinary afternoon and photograph it in realistic lighting.
Let Your Skin Look Like Yours
Successful bridal makeup for acne-prone skin comes down to thoughtful placement, clean tools, and realistic expectations. Keep skincare familiar, build coverage only where needed, and test how everything wears. Your skin does not need to be perfectly smooth for your makeup to look polished, photograph beautifully, and feel comfortable.